
An exploration of home grown colour
For the last decade , I have cultivated colour in my own garden, upscaling my dye plant pots and foraging for colour to a fair size dye garden 3 years ago. I do enjoy coaxing vibrant hues from the flowers and leaves that surround me.
My journey with natural pigments began much earlier, back in the 1980s, when I started dyeing yarns for my weaving practice at collage in the Scottish borderlands. There was a period—while I was teaching art, craft, and design—when my weaving took a paused but the time was not wasted I learned mindfulness and the importance of our connection to nature for wellness, but the longing for botanical dyes and the sound of a shuttle hitting its picker box drew me back.
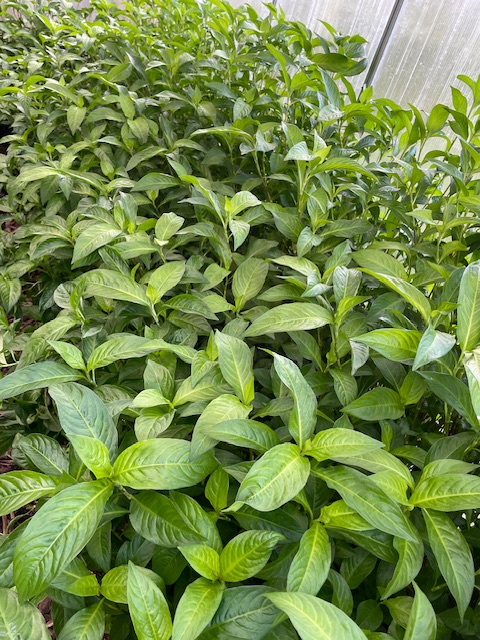
Today, I want to share one of my passions: growing Japanese indigo, Persicaria tinctoria, and transforming its fresh green leaves into brilliant blue pigment. Also to demonstrate that this little act can be one of quite rebellion, turning my back on synthetic colours and all their planet pollution during and after their production. The natural dye process of working with nature in a completely soil to soil ethos is both enchanting and deeply satisfying, bringing a sense of reverence as I witness the alchemy of nature: how a humble leaf can yield such a coveted hue how a humble woman can own her own colours.
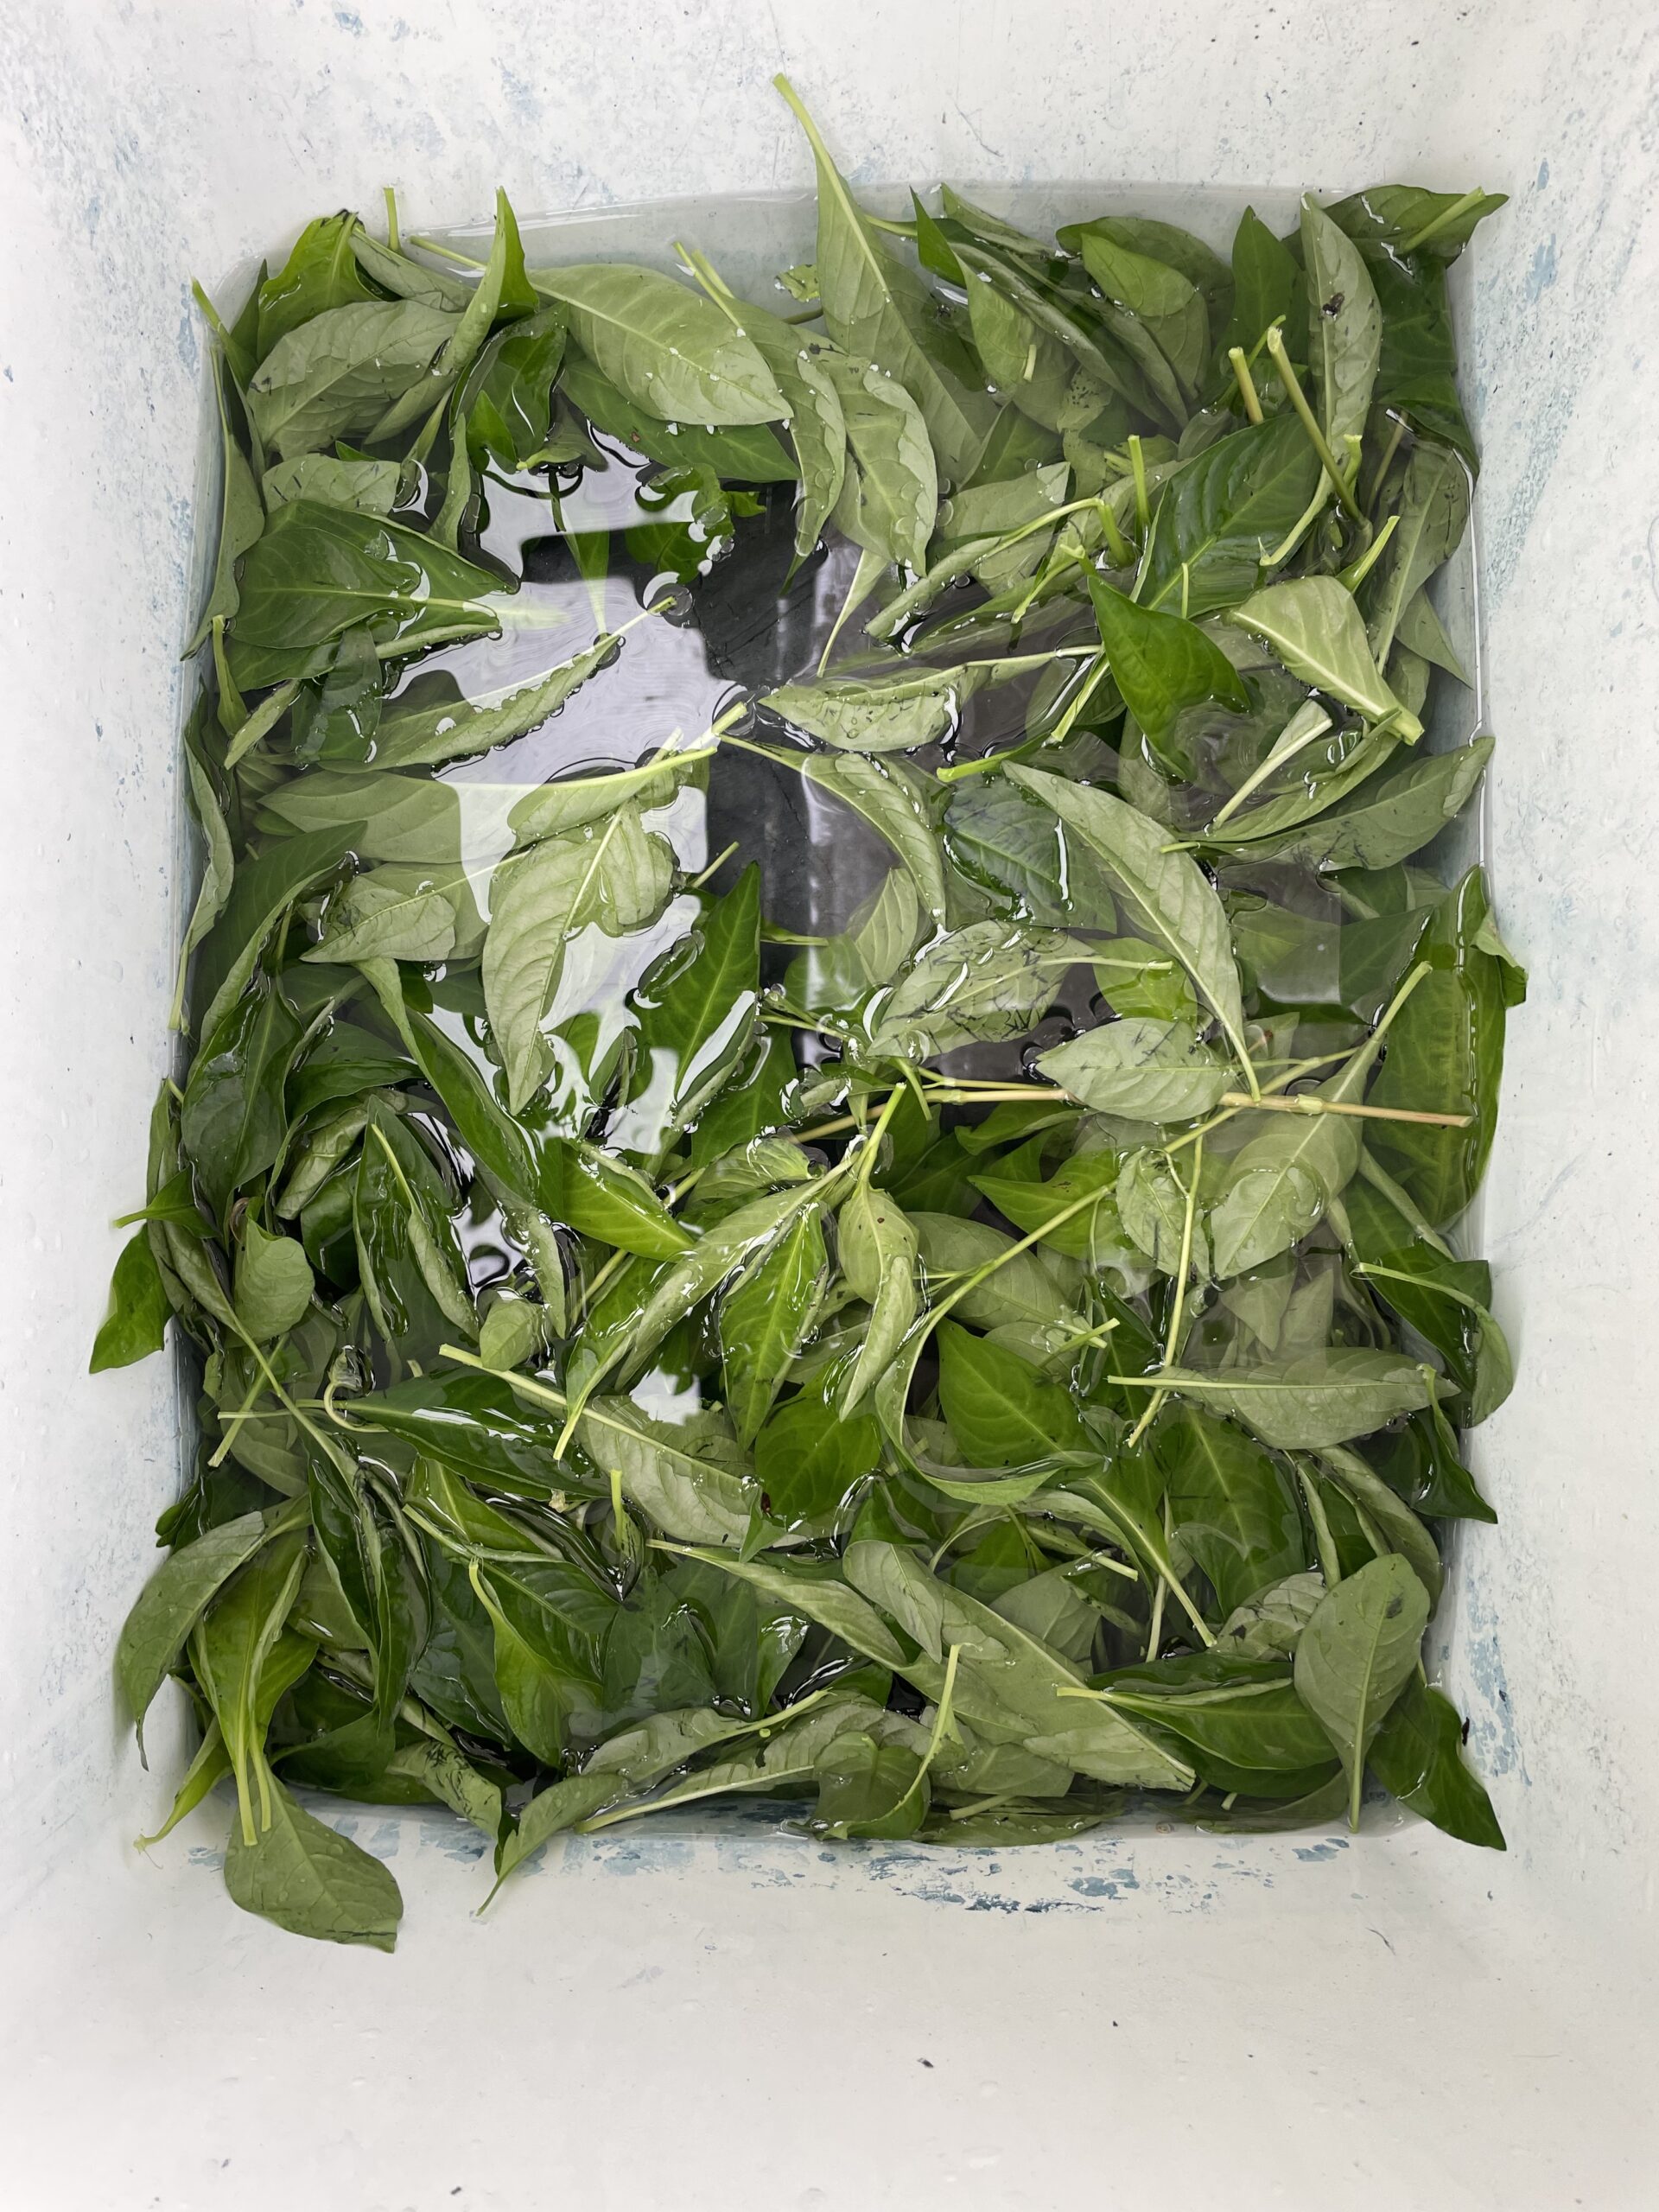
Growing Japanese indigo requires patience and care—sowing seeds in early spring, nurturing the seedlings through the unpredictable weather, and watching as the plants flourish into lush, emerald stands a few months later. I am amazed how strong they grow. The harvest is relatively simple I pluck the leaves and begin the extraction, submerging them in water to coax out the latent blue.
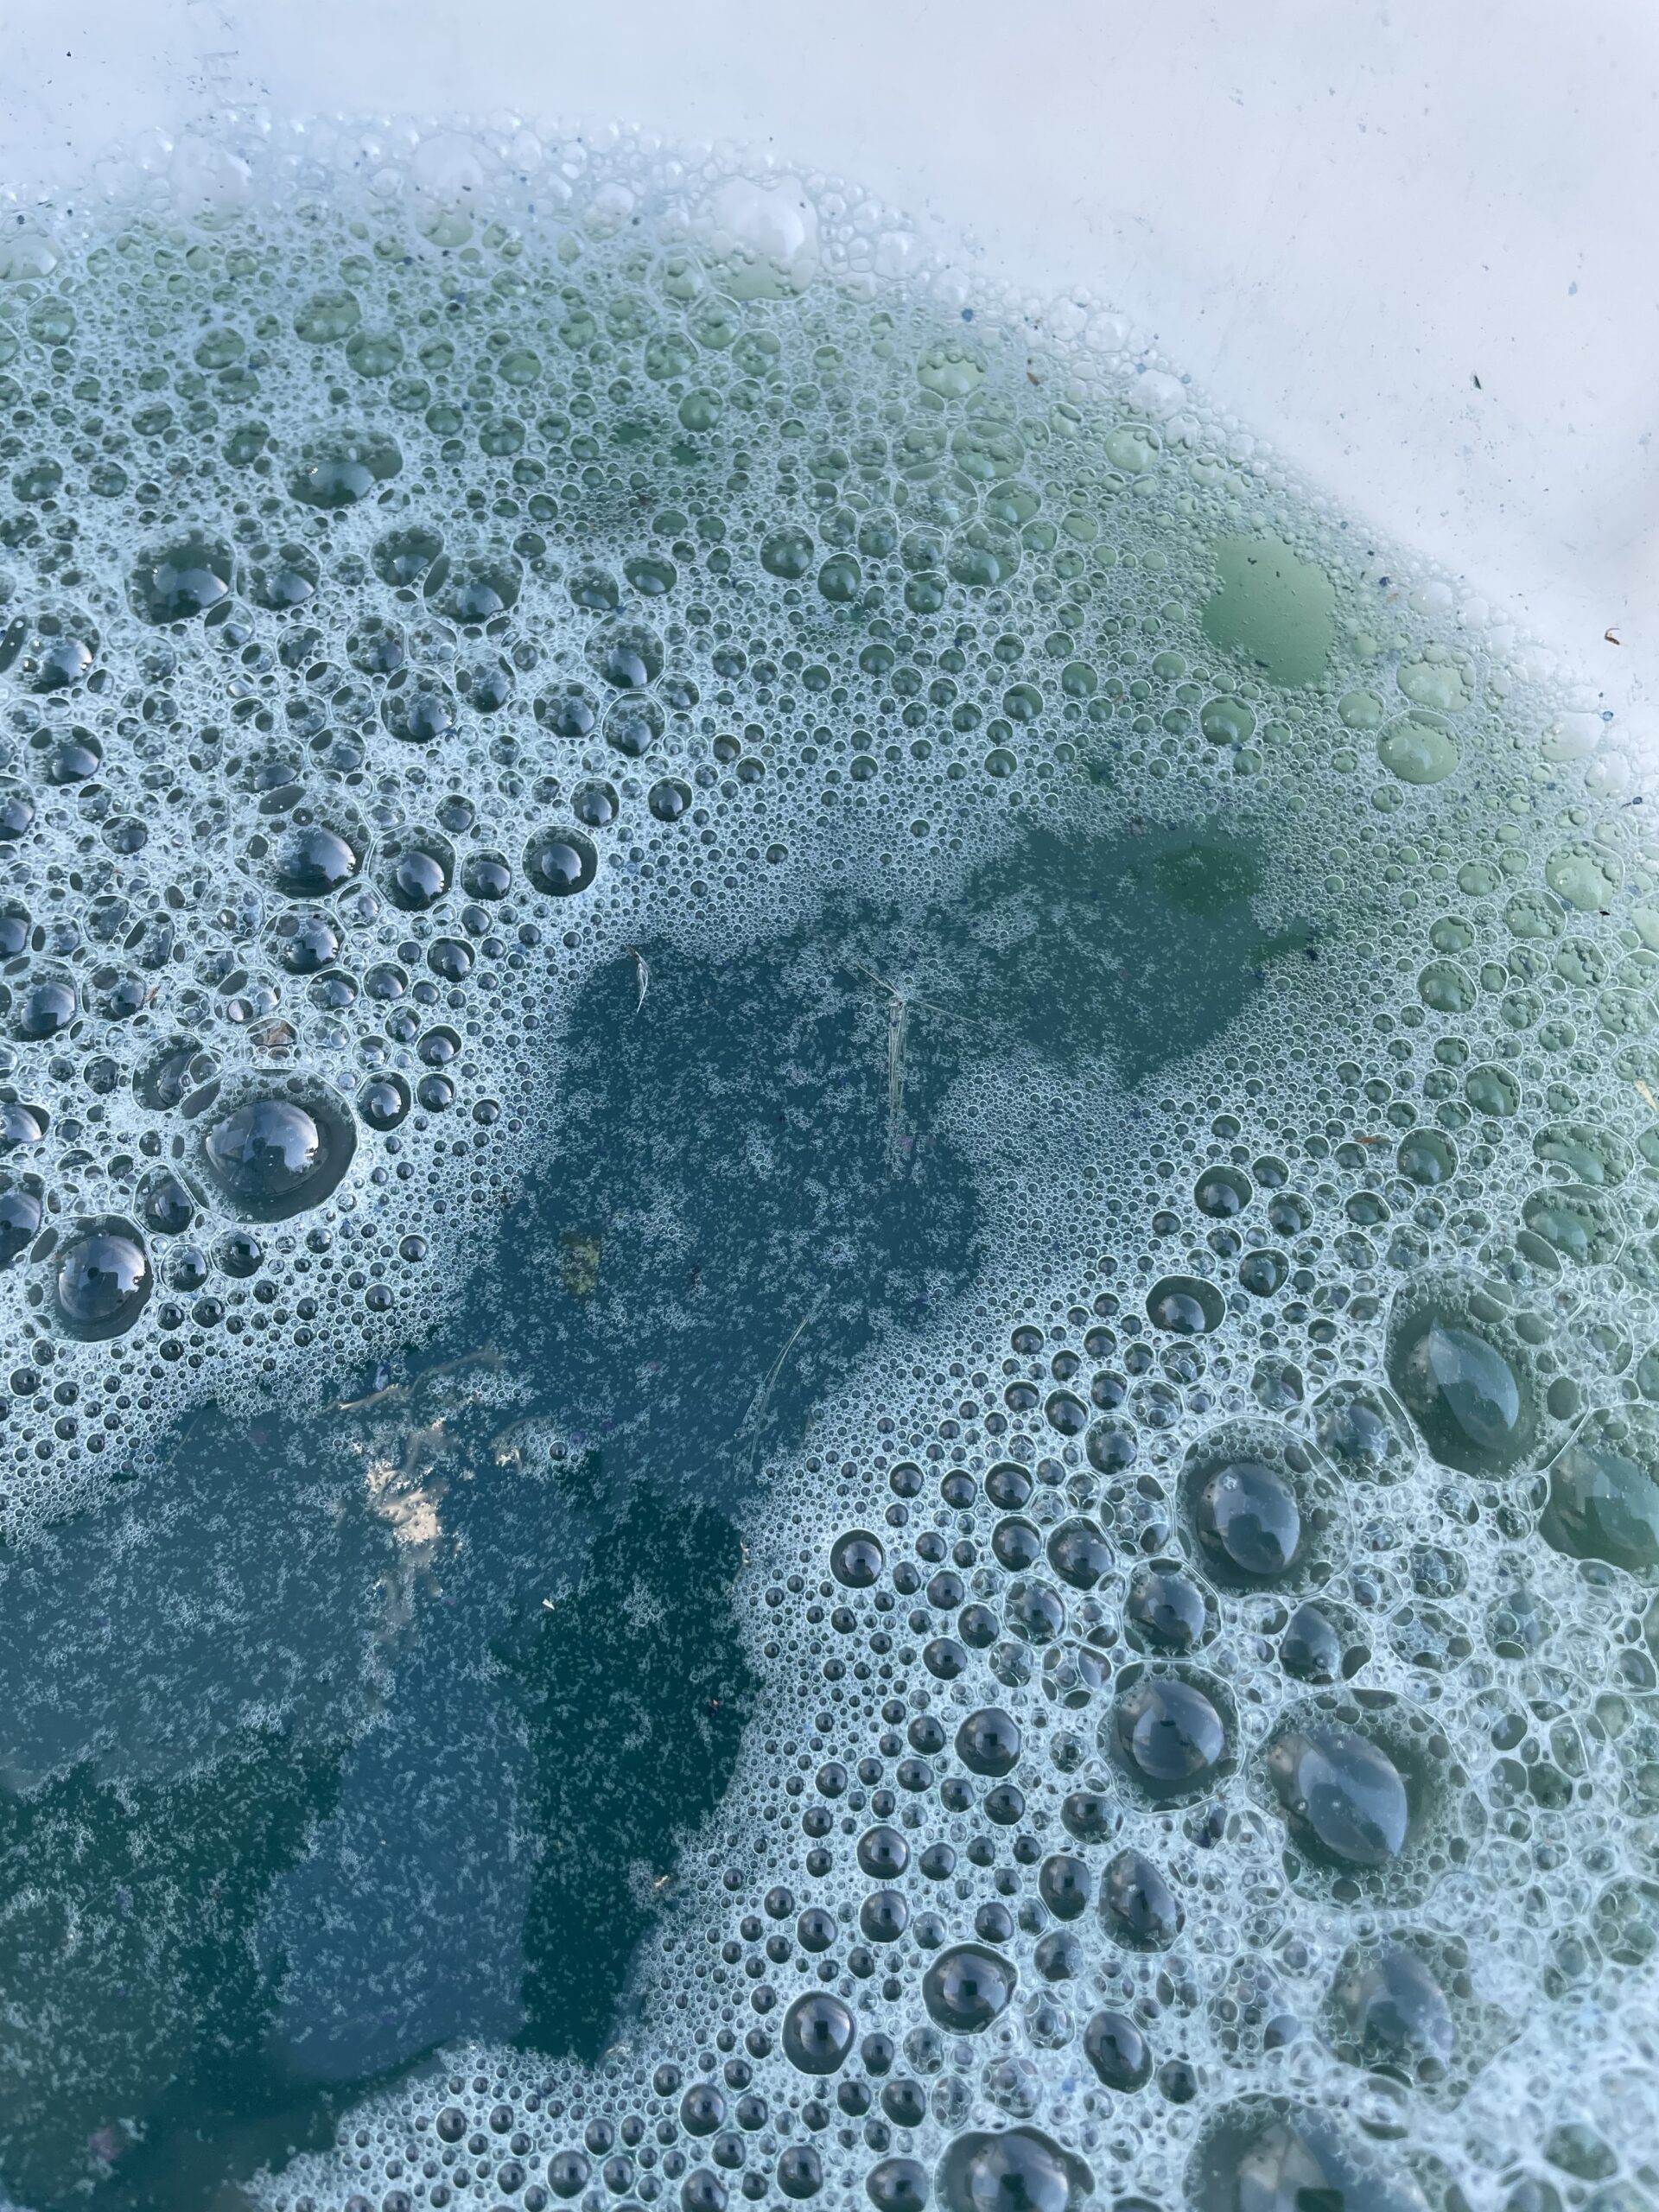
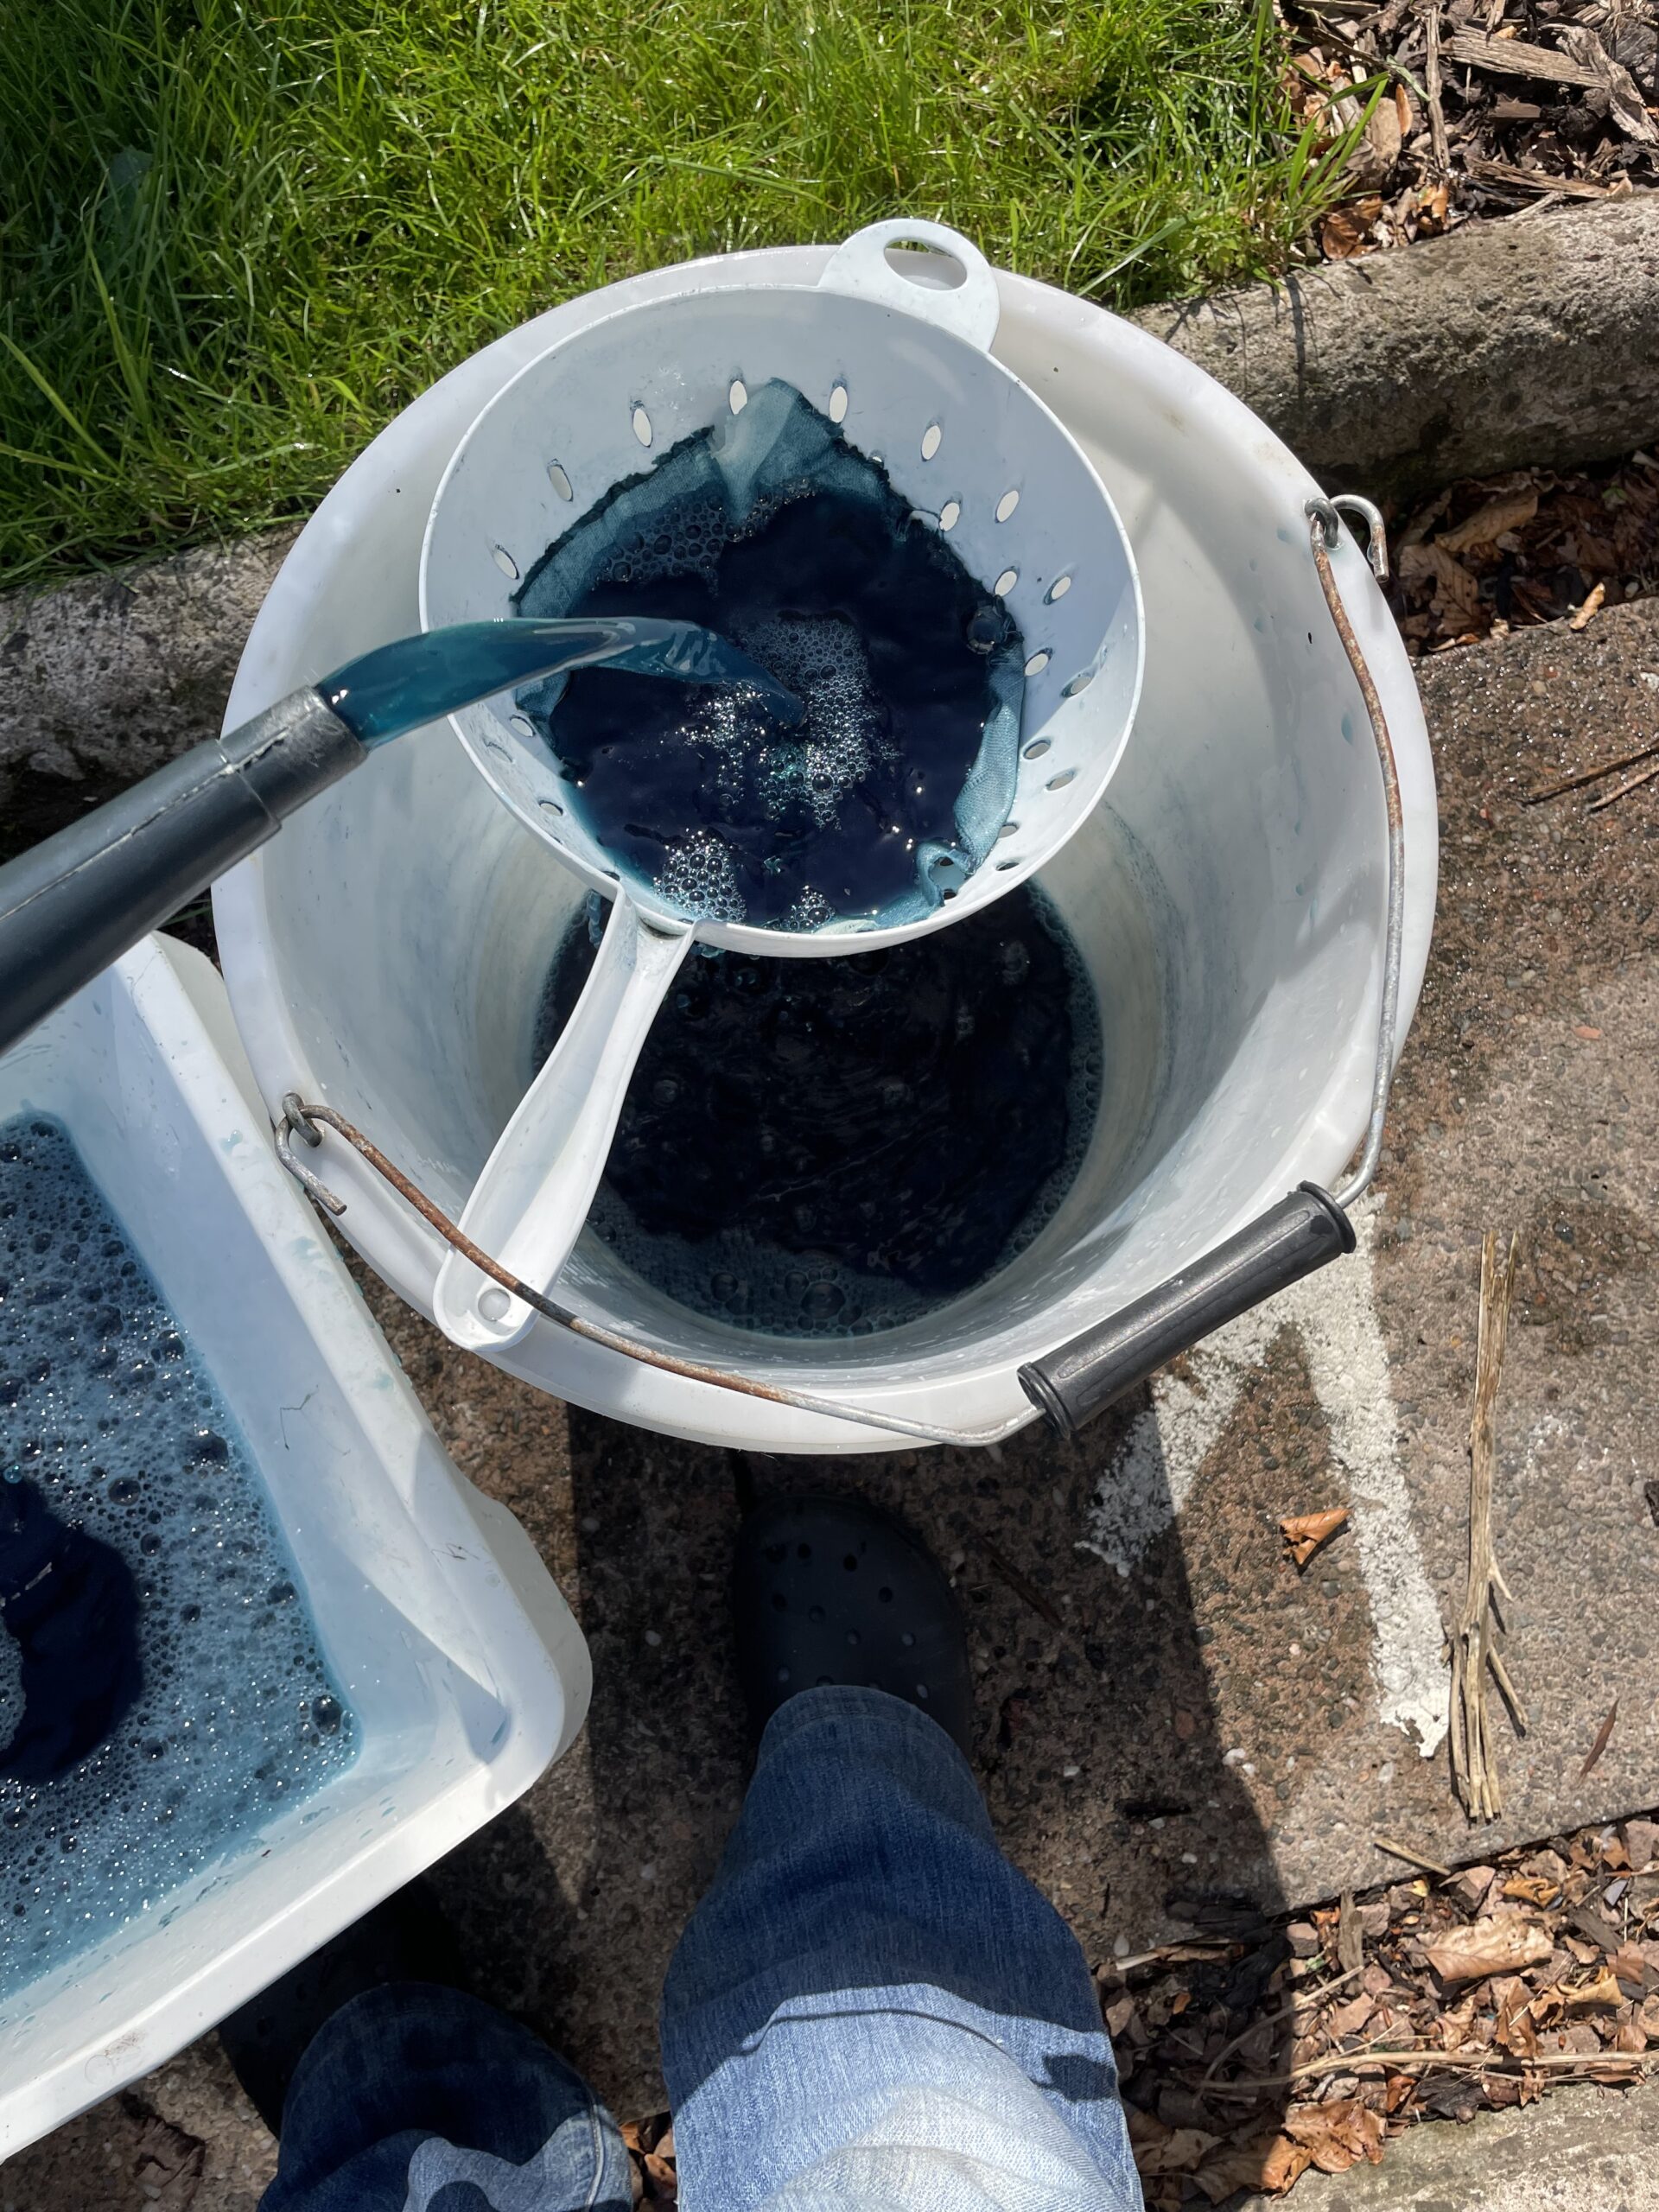
The transformation never fails to inspire—a green leaf, soaked for a day or two to reveal a luminous green water aerated, then aprox a teaspoonful per small bucket of lime added and voila a swirl of blue flock that seems almost miraculous and quickly settles into pigment.
This homegrown pigment has become the soul of my weaving. It carries the story of seasons in my garden, the memory of every sunlit day and rain-soaked afternoons tending, tidying and soaking various plants in buckets and jars. I love how seasonal my weaving has become the summer too hot for the clatter of flying shuttles, for me is much more productive tending to my dye garden and in mid winter when the fury of Christmas orders has stalled the anticipation of colours to come as new seeds are planted. Each batch of yarn I dye is unique, a testament to the living nature of my craft and the place from which it grows. I no longer worry about what synthetic chemicals are in touch with my biggest organ the skin I no longer fret about what hue works with what as for me nature has harmony every shade hue and tone complements another in botanically dyed yarn seamlessly
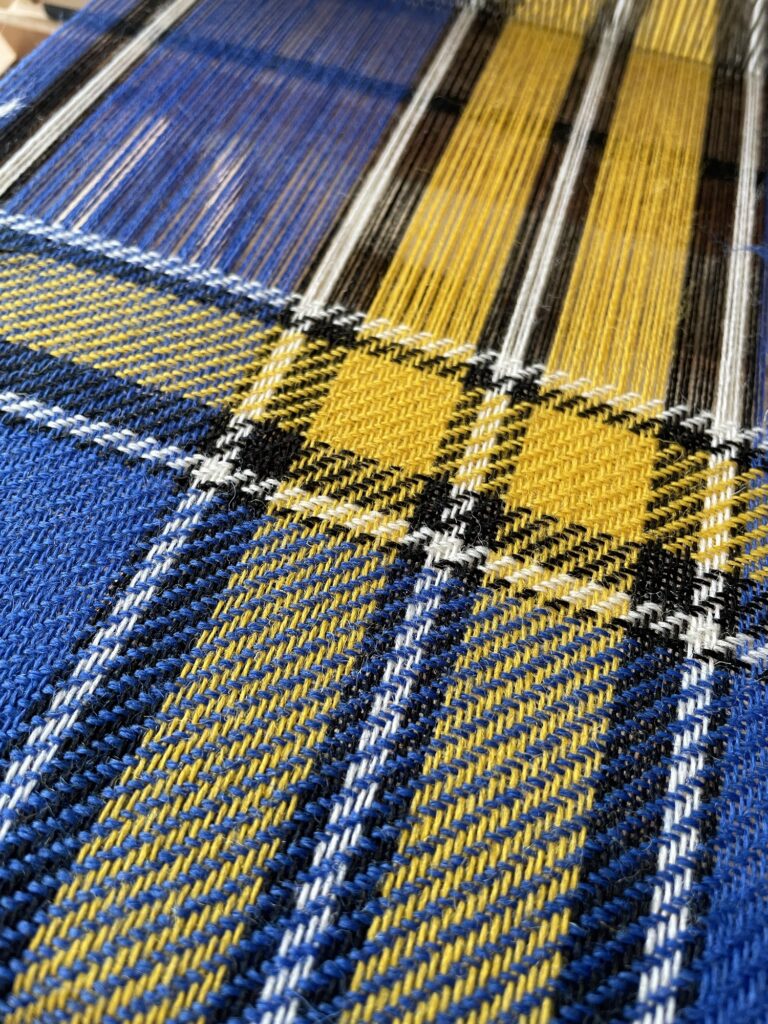
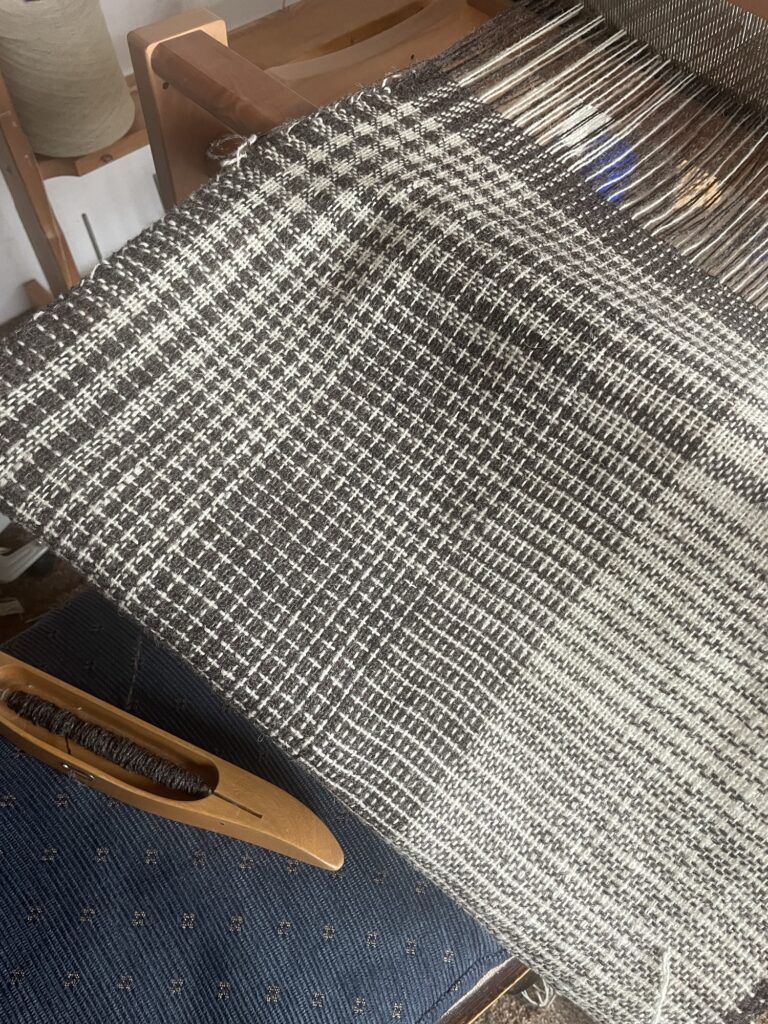
Weaving tartan
The first ever industrial weave ticket I ever made was for a black watch tartan.
The younger me wished never to “design” a tartan again!
I was more interested in the myriad of other ways of intercepting warp and weft. Play with structures colour and weave effects and not be that person who weaves 2/2 twill be the “more intelligent” designer the more contemporary.
Well I’ve got over myself.
It’s about the cloth. I still get excited when I’ve designed from scratch to watch it build up as I weave.
To be honest now with the powers of the internet everyone has access to the myriad of weave designs. You don’t need a degree or serve an apprentice a few click and you see the peg plan or these days the computer program lifts easily. There’s very little new historical weavers have already discovered most interlacing, there is not much new just new generations discovering and using maybe new colour ways.
So here I am celebrating cloth of my country. Contemplating traditions, family identity and heritage. Enjoying the mindful counting of picks, watching the skill of even tension and beating up, following the colour sequence, knowing that it is a very useful cloth that someone wants to celebrate their own life.
Upscaling my dye garden
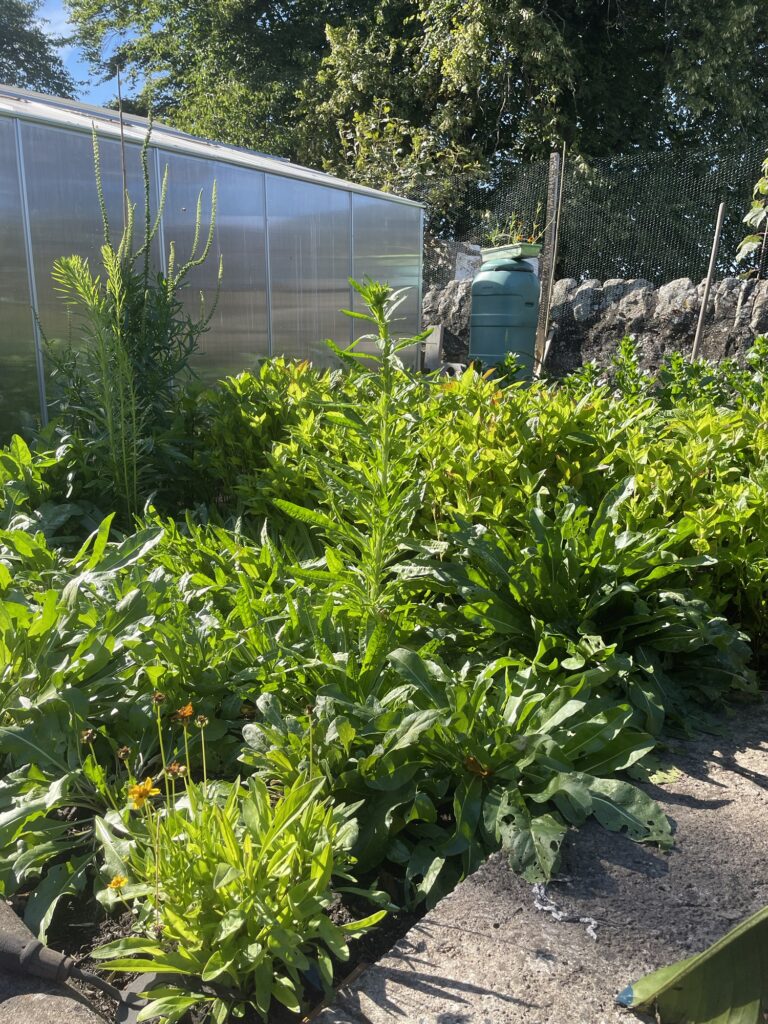
So this year I vowed to not only grow more colour for my own uses for my own practice, but also for workshops to empower others to connect to natural dyes, also to make sure I had enough plants to give to local growers where I’ll be holding dye workshops over the summer, as well as sell a few to folks who’d like to start their own dye garden.
I’ve been dabbling over the years well since my college days producing my own palette of natural colours. Back in the 80s I found it almost impossible to learn especially as I attended an industrial textiles course who’s emphasis was on larger scale production which means many cones of yarn dyed in autoclaves to Pantone shade with all the testing for fastness and durability that comes with industrial standards. Thankfully now, with the increasing awareness and new generations willing to do their own experiments as well as dyestuffs and mordants readily available at the touch of a buy it now button we all have the chance to explore an alternative to synthetic dyes. I’m embracing my own practice, connecting to nature both in colour and physically maintaining the dye plants.
With the purchase of additional garden ground, my children all grown and flown the nest, let alone living in what has been called Scotland’s larder – Fife- so no need to grow my own foods, I can indulge in my passion, my dye garden. Generations of my family have worked the land, I grew up with the double dig necessary to grow but I knew there could be a better way. Learning from fibreshed and regenerative agriculture in general, knowing that satellites can now see carbon being released when soil is broken or tilled as they say in the USA what we really need is to sequestrate carbon back into the soil. My mind if we all do a little bit then a lot can be achieved. I delved deep into the no dig method and came across Maria Thun and her biodynamic gardening experiments in Germany. I call myself spiritual rather than the Church of Scotland religion I was brought up in, this planning when to grow by the phases of the moon resonated with me. Together with the fact the “new” ground had been under Teram and red chipping for 25 years my no dig dye garden experiment began.
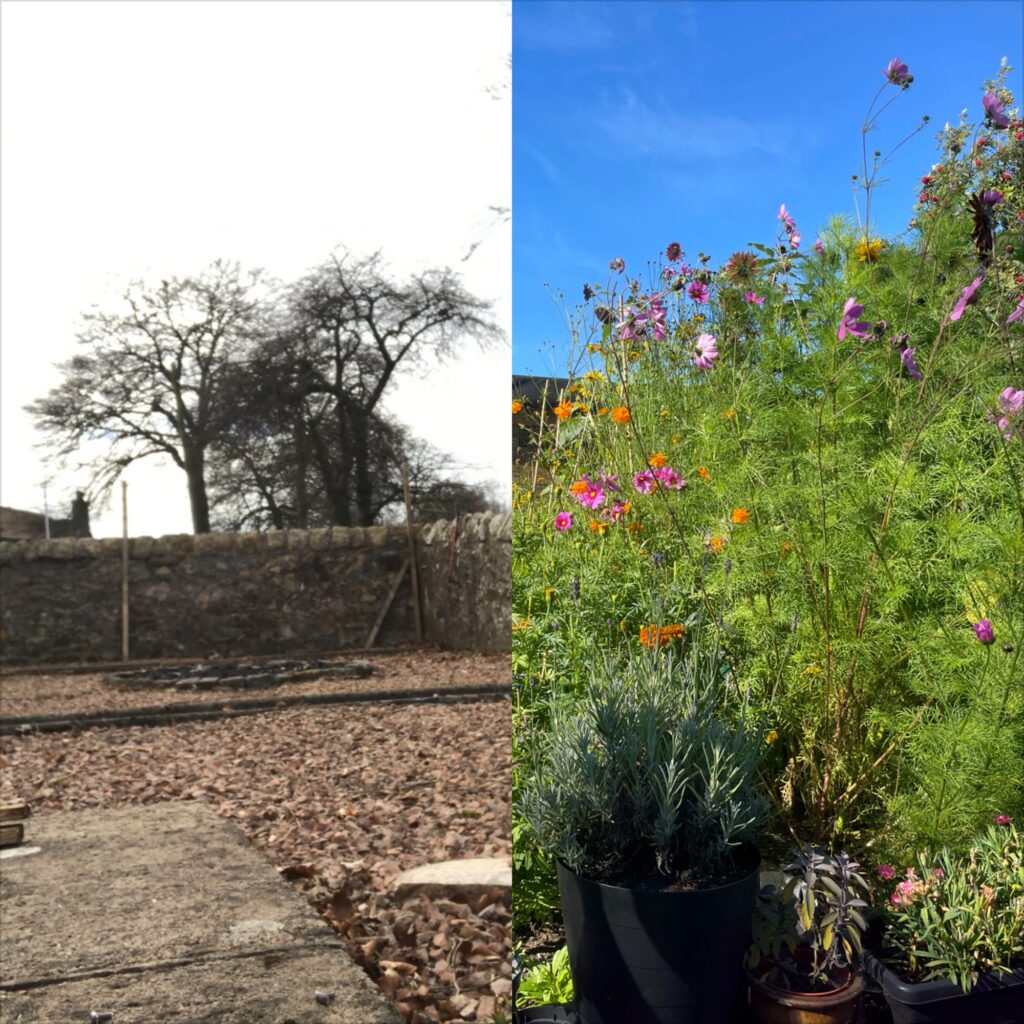
It’s hard when planning a dye garden although you might research sizes and spacing there were none around for me to visit. Would these plants grow next to the North Sea! onward with the experience. I didn’t know the quality, ph of my soil or if the conditions were favourable. I had crowdfunded for a new workshop space a 20’ one with its own 10’ lean to greenhouse- my dream was to watch my indigo grow as I worked and for students to do so too. As it happened the tall dye sunflowers I had planted along with the greenhouse gave a perfect microclimate for my outdoor indigo let alone the other plants.

It worked better than expected so onward for 2024 upscaling my dye plant production Word spread and a kind donation of 3! Professional grow system along with my own heat mats enabled me to start my seeds off in the dead of a Scottish winter.
I quite enjoyed the mindfulness of the seedling rearing and the almost endless pricking out definitely a new system will be adopted for next year. Maybe almost a mini production as I’d love to see dye plants available to the public in nurseries or fairs. I don’t think I’m grandiose in that dream.
I’ve supplied 2 local estates and enough for workshops here at Balgarvie Weaving dye house this summer too. If you’d like to attend one just head over to Eventbrite
Ashford 4 shaft loom
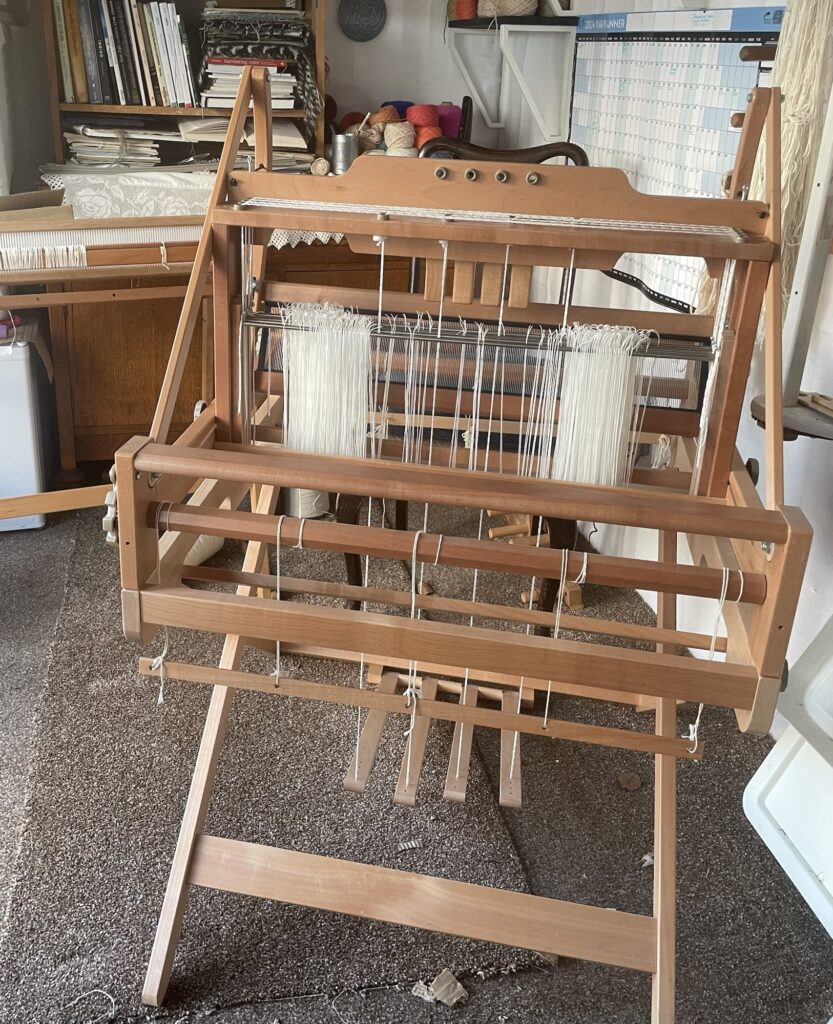
I purchased this little pre loved loom recently. I bought it because I wanted a loom I could transport, to have as a demo loom for events. I’m increasingly being asked to talk about my practice and my involvement with fibreshed Scotland to a variety of groups and associations and as I’m a hands on type I want to have a visual aid to hopefully inspire others to have a go at weaving.
So after what seems like ages for a pre owned loom this one popped up at the right time for the right price, in fact the exact same amount of money I was about to have payed into my bank for a couple of groups I was asked by Fife Contemporary to host. It felt right.
I had learned on George Wood looms which are full size floor looms. I then designed on industrial double width looms, a far cry from a wee thing like this loom.
I have in my studio a 16 shaft semi production floor loom and just let go of my double width Glimakra floor loom as the old hips were complaining.
While this loom is lighter in weight I wished to embrace new weaving.
I warped up for me a very small warp of 10m with a relatively thick weaving yarn just to get to know the loom
I was getting frustrated that I couldn’t throw the shuttle as I knew I could. The shuttle just kept falling through the warp. This I assumed was the design of the loom and as I had bought the widest possible I thought that the loom was really for small warps where the weaver could throw the width of the warp easily.
What was not working for me?
The design of this loom has no shuttle race. As it came with stick shuttles I guess this is how it’s supposed to be worked.
For me weaving longer lengths I’m used to using shuttles and pirns.
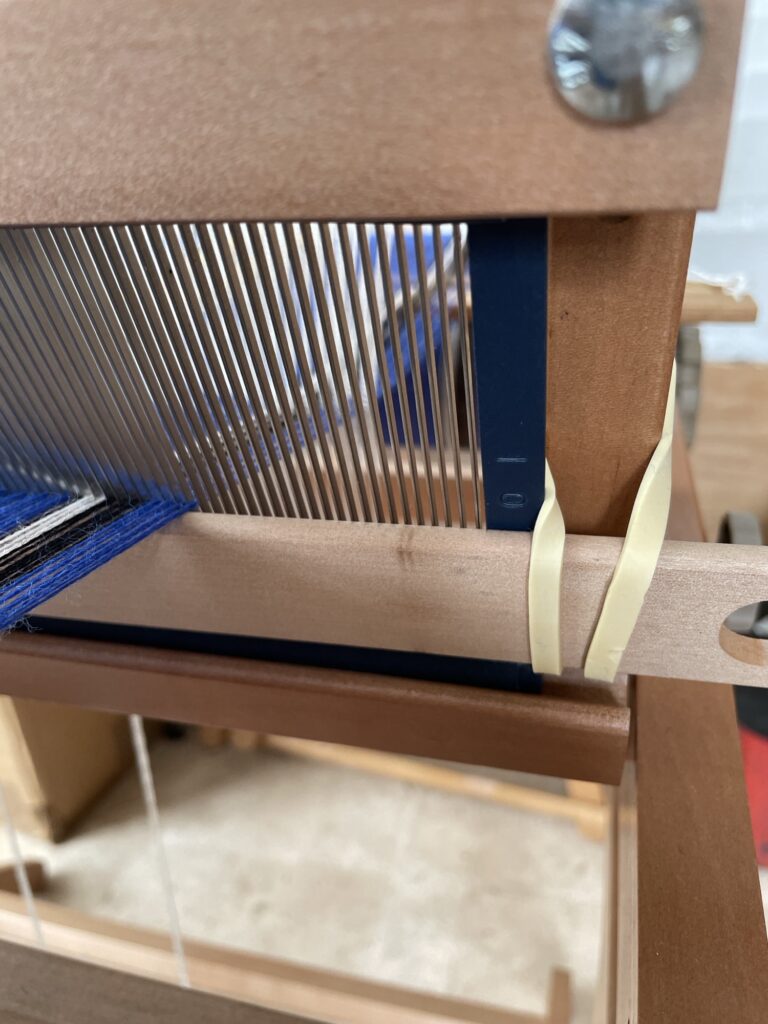
Doing my best Heath Robinson impression I have attached a stick just under the warp. Hay presto it works.
Hope this helps you weave faster with your ashford too.